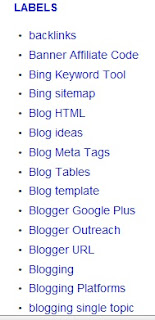
If you have a long list of posts under your labels, it would be much better if you would arrange them in columns. This not only improves the appearance of your blog but you also make it easy for your readers to access to your posts or to see your posts easily without having to scroll down. It is also a way of saving your space since they will occupy a less space.
This is an example of how labels usually looks like in a blog in one column;
How to Divide your Categories or Labels into Columns
- Go to Dashboard
- Template
- Edit HTML
- Proceed
- Save your template before making changes
- Click on the box next to Expand Widget Template
Using Ctrl + F, locate your Label id by typing this; id='Label.For example, my label id in this example is 2. Note that, the id='Label number differs and in your case, it might be a different number.
Once you have located your label id number, using Ctrl + F once again, locate ]]></b:skin>. Place the following code just before ]]></b:skin>.
#Label2 ul li{
float:left;
width: 50%;
Replace my id='Label2 with your id='Label number. This is how my label looks like after I have arranged them into two columns;
If you have enough space on your sidebar and you would like to have more than two columns, decrease the 50% percentage to a lower number. Preview your blog and if your like what you see, click on Save Template.


