Advertise with me..................................

Your Ads Here..................................

Just for my note..................................

You can read but don't do negative..................................

You get +, then don't do - ..................................

Showing posts with label windows8. Show all posts

How to Fix ‘File Path Too Long’ Error

7:13:00 PM | , , , , , ,


How to Fix ‘File Path Too Long’ Error While Copying, Deleting or Opening Files, Without Using Third Party Applications
Here I Fix ‘File Path Too Long’ Error While Copying, Deleting or Opening Files. ‘File Path Too Long’ Error is an error that when you try to copy something. So, it happens when you copy any file and then just try to paste it. This error stops you from the copying process and you can’t complete the process. This happens due to the pre-defined character limit and beyond this limit you cannot name any file or other stuffs. Mostly the character range is 256-260 characters. The important thing is that the character limit is for the file path and the file paths are too long if the file is too deep behind the folders and folders and hence the error occurs. Now lets see the solution to this error.
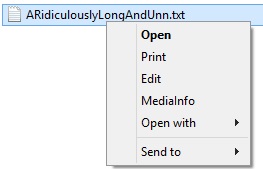
Step 1:

The first easy thing is that you just shorten the file and the folder names coming along the path to reduce the characters length.

Step 2:

Now open the command prompt and type the below command:
subst J: “the file path you want to shorten”
In above command in place of “J” you can write any drive letter.

Step 3:

Now open the J drive and just copy the data from there.
Note: Now to remove the new drive J just type subst J: /d in command prompt.
That’s it.

==================
Why does it come?
There is a pre-defined character limit beyond which you cannot name a file or folder, and it varies from one OS to another. Mostly it varies between 256 and 260 characters. This is the character limit for a file name, which excludes the file path under which it is located, like “C:\Documents and Settings\Test User\Desktop\test file.txt”. But, when you copy a file from one location, it takes into account the entire file path. So, if the file is residing under a folder which is too deep or too long, that has a length beyond the set-limit, you will get errors like the ones shown above.
How do I know that the file path length is causing the issue?
  • One way you will know is definitely from the error messages similar to the ones above which clearly mentions the problem.
  • Some other times, it won’t. You will simply get a message saying ‘Cannot Copy’ in the title.
  • Or, some other times, the files won’t open properly. They would open and close instantly without giving any errors.
  • Also when you right-click such files, the number of options available in the right-click menu would also be limited compared to other files.
Error 4
All these are caused by those incredibly long file paths.
So, how can I copy the files or fix this issue?
There are a couple of ways you can fix this easily without the use of any 3rd party applications.
  1. Check the folder path, and shorten some of the folder names in between thereby reducing the file path length. You don’t necessarily need to put the folder name as ‘Mission Impossible Three’ when you can still recognize it as ‘MI 3.’
  2. The main thing many people miss when they save a file or folder their Desktop is that the actual path to that folder in desktop is either ‘C:\Documents and Settings\%username%\Desktop’ or ‘C:\Users\%username%\Desktop’ depending on your OS. So as you can see, its already longer than you thought it is. Go to Start — Run and type ‘cmd‘ and press OK, or click start/press windows key and type ‘Command Prompt‘. Once in the command prompt window, type the following command :
subst V: “C:\TheRidiculouslyLongFolderNameWhichYouDontNeedAtAll” ,
where
subst = substitute command
V = a drive letter of my choice, you can select your own.
C:\TheRidiculouslyLongFolderNameWhichYouDontNeedAtAll = the file path you want to shorten. Change it according to your situation.
Error Fix Command
So, basically this command would convert the entire folder path you provide in the command, into a single temporary drive letter, like V in this case, which gets created in My Computer. Now all you need to do is, go to the My Computer, and open the V drive, and copy the data from there.
After the Fix to File Path Error
Note : To remove the new drive from My Computer, go to Command Prompt again and type subst V: /d
Read More

HDMI Output Problems in Windows

11:24:00 AM | , , , , ,

If you upgrade/downgrade your system and getting trouble with your HDMI output,

Rollback to the older driver

Open Device Manager and find the driver that is giving you trouble.
Right click it and choose Rollback driver to install the previous version of the driver.

Sometimes, it’s better to use the default driver than the newer version of driver. (sometimes, your system do not support newer of latest driver.) 

To use the default driver you’ll need to uninstall the current one you’re using and the default one will install itself. To uninstall the driver, do this:
  1) Open Device manager and find the buggy driver.
  2) Right click it and choose Uninstall.
  3) Check Delete the driver software for this device and click OK.
  4) Restart your computer.

(or)

Sometimes, your driver is getting old and you need to update a newer or latest version.

Read More

Laptop PC Touchpad Not Working

11:02:00 AM | , ,

To check for Touchpad on or off,
open the PC settings screen
press Windows Key + C 
or 
swipe in from the right,
tap Settings, and tap Change PC settings.
Navigate to PC and devicesMouse and touchpad
 and ensure the Touchpad option is enabled.

Read More

How to Use Zawgyi-One Font on Windows 8+

5:57:00 PM | , ,

  1. First download Zawgyi One Font and Zawgyi Typing keyboard from the link below. 
  2. Install Zawgyi One Font and Zawgyi typing Keyboard Setup.
  3. Then, install  IEZawGyiGtalkfont
  4. Control Panel >> All Control Panel Items >>> Language ... 
  5.  Go to Advaced Settings >>> click here for more>>>

Read More

How to Fix DNS Server is not responding on Windows 7, 8

5:21:00 PM | , ,

When you try to connect to the Internet, the connection might fail when we run the Troubleshooter, and you might get this error: The device or resource (DNS server) is not responding. The exact error would be:
You computer appears to be correctly configured, but the device or resource (DNS server) is not responding.
11 FIX: DNS Server is not responding on Windows 7 | 8

DNS Server is not responding

In such a scenario, there are few things you could try to resolve it.
1.       First backup your Router settings and update the Firmware of your Router. Check the Router manual for more information
2.       Next thing is to change the DNS server address manually.
  • Go to Start and Click on Control Panel
  • Open up Network and Internet and go to the Network and Sharing Center.
  • Click on Change adapter settings

2 FIX: DNS Server is not responding on Windows 7 | 8
  • Now you’ll see the list of Network adapters select the Network adapter  that your using and right click on it and go to properties
31 600x379 FIX: DNS Server is not responding on Windows 7 | 8
  • Then Click on “Internet Protocol Version 4 (TCP/IPv4)
  • You’ll see the Internet Protocol Properties
41 FIX: DNS Server is not responding on Windows 7 | 8
  • Select “Use the Following DNS server address:
  • Enter the Preferred DNS address:   208.67.222.222
  • Enter the Alternative DNS address: 208.67.220.220
  • Then select on Validate settings upon exit.
511 FIX: DNS Server is not responding on Windows 7 | 8
  • Click OK, and then Close to finish.
3.       Now you have to enter the same DNS address in Router configuration as well refer the router manual for more information.
4.       Try to Install and Configure OpenDNS and see if that helps
5.       Next step is entering the Physical address in the Network adapter setting
  • Go to Start and type in CMD and Hit Enter
  • In command prompt type in IPCONFIG /ALL
  • Then look for your network adapter
51 600x194 FIX: DNS Server is not responding on Windows 7 | 8
  • Then right down the Physical address according to this screenshot it’s 78-DD-08-F1-DF-B0
  • Then go to Start and type in NCPA.CPL
  • Then Right Click on your Network adapter and go to Properties
61 FIX: DNS Server is not responding on Windows 7 | 8

  • Then select Configure

7 FIX: DNS Server is not responding on Windows 7 | 8
  • Then Click on Advance Tab and select Network address
  • Select the radial button Value
  • Type in the physical address you wrote down before
  • i.e. 78-DD-08-F1-DF-B0 (Remove the dashes when you type in i.e. 78DD08F1DFB0
  • Then Click Ok and Reboot the System.
6.       Next step is to look up your Network adapter model and go to the manufactures website and find the appropriate drivers and update the Drivers and see if that resolves your issue.
7.       Disable your Firewall settings completely and see if that blocks your connection.
Read More

How to Repair Windows Errors?

2:48:00 PM | , , , , ,

Problem: If you do not maintain your PC on regular basis, many PC errors may occur such as windows crashes, slow performance and error messages. Regular PC usage, continue installing and uninstalling software, accumulates junk on your PC which badly affects Windows's smooth operation and performance.

Solution: In order to fix these errors and avoid them in future, it is recommended to use Windows Repair Tool regularly. Perform your routine Windows maintenance tasks easily and automatically with it and make PC stable and faster.
Download windows repair toolDownload Windows Repair Tool
Compatibility: Windows 8, 7,Vista, XP, ME, 2000 (32/64)
Download File Size: 4.1 MB, Download Time: 2sec on dsl, 2min on dial-up

Diagnose & Fix your PC problems in 3 simple steps:
1.Click here to download Windows repair tool.
2.Double click on the setup file and follow the on-screen instructions to install the product.
3.Run a Scan and fix the detected errors by clicking the "Fix All" button.
Download now
McAfee SECURE sites help keep you safe from identity theft, credit card fraud, spyware, spam, viruses and online scams

Windows Repair Tool helps:
This software is designed to diagnose your PC problems and repair them quickly. It scans your PC and finds the problems and effectively fixes them.
Read More

Why is my screen black when I start Windows 7?

10:15:00 PM | , ,

Video adapter problems are the most common cause of this issue.
Try the following troubleshooting procedures, in order. If the steps in the first procedure don't fix the problem, move on to the next procedure.

Reinstall your video driver

  1. Right-click the taskbar, and then click Start Task Manager.
  2. Click the Processes tab, click explorer.exe, and then click End Process.
  3. Click File, and then click New Task (Run).
  4. In the Open text box, enter explorer.exe, and then click OK.
  5. Click the Start button Picture of the Start button, enter device manager in the search box, and then, in the search results, click Device Manager.
  6. Double-click Display adapters, right-click your display device, click Update Driver Software, and then follow the steps in the wizard that appears.

Note

  • After the driver is reinstalled, you might need to restart your computer again to complete the installation. You might also need to adjust the screen resolution to its previous setting. For more info, see Change your screen resolution.
If these steps solved the problem, you're done. If not, go on to the next set of steps.

Check for registry issues

  1. Right-click the taskbar, and then click Start Task Manager.
  2. Click the Processes tab, click explorer.exe, and then click End Process.
  3. Click File, and then click New Task (Run)
    In the Open text box, enter explorer.exe, and then click OK.
  4. Click the Start button Picture of the Start button, enter regedit in the search box, and then, in the search results, click regedit.exe.
  5. Browse to the following registry key: HKEY_LOCAL_MACHINE\SOFTWARE\Microsoft\Windows NT\CurrentVersion\Winlogon
  6. Click to select the WinLogon key, and then, in the right pane, click Shell. The value of Shell in the Data column should be explorer.exe. If the value of Shell isn't explorer.exe, double-click Shell, and then, in the Value datatext field, enter explorer.exe, and then click OK.
  7. Close the registry editor, and then restart your PC.
If these steps solved the problem, you're done. If not, go on to the next set of steps.

Start the computer in safe mode and run System Restore

  1. Click the Start button Picture of the Start button, click the arrow next to Shut Down, and then click Restart.
  2. Do one of the following:
    • If your computer has a single operating system installed, press and hold the F8 key as your computer restarts. You must press F8 before the Windows logo appears. If the Windows logo appears, try again by waiting until the Windows logon prompt appears, and then shutting down and restarting your computer.
    • If your computer has more than one operating system, use the arrow keys to highlight the operating system you want to start in safe mode, and then press F8.
  3. On the Advanced Boot Options screen, use the arrow keys to highlight Safe Mode, and then press Enter.
  4. Log on to your computer with a user account that has administrator rights. When your computer is in safe mode, you'll see the words Safe Mode in the corners of your monitor.
  5. Click the Start button Picture of the Start button, type "system restore" in the search box, click System Restore, and then click NextAdministrator permission required If you're prompted for an administrator password or confirmation, type the password or provide confirmation.
  6. Choose a restore point when your PC worked as expected, click Next, and then click Finish.
  7. Restart your computer normally.
If these steps solve the problem, you're done. If not, try repeating the steps and selecting an older restore point (if one is available). If that still doesn't solve the problem, contact your computer manufacturer or technical support for further assistance.
Read More

Transform Windows 7 and 8 to iOS6

1:55:00 AM | , , ,


Download online installer with auto fix bugs: (recommended)
X64: soon
X86: soon

Download offline installer:
7X64: Download
7X86: Download
Win8: Download

Note : Skin Packs installer have easy and safe install option , Please unistall old or other version of skin packs before install new version. Before install close all runnig program , after finish restart your system.
>>more on Skin Pack <<
Read More

Disable automatic signing of last user in Window 8

1:39:00 AM | ,

If you have multiple user accounts in Windows 8  (e.g. one for yourself and another for your family member), you may notice a new annoyance in Windows 8 – it signs in the last user automatically who shut down/rebooted the PC. Most users would not like to be signed in automatically and would instead prefer seeing a list of users at the logon screen, from where they can choose which user account to login in with. Today, we are going to share a simple tweak which will allow you to prevent Windows 8 from automatically signing in the last user. Let’s start.
In Windows 8, the auto sign in process is controlled via the “Enabled” DWORD value at the following registry key:
HKEY_LOCAL_MACHINE\SOFTWARE\Microsoft\Windows\CurrentVersion\Authentication\LogonUI\UserSwitch
disable automatic log on of last user in Window 8
If the “Enabled” parameter is set to 1, you will get the list of users instead of the last user automatically getting signed in. A problem however is the behavior of the LogonUI.exe process which set the “Enabled” value to zero at every startup, even if you set it manually to 1. Why this behavior is introduced is not known.
So, the only way to prevent the “Enabled” value from being overwritten is to remove write permissions on it and set it to read-only.
Here are the steps to do just that.
First, make sure that you have disabled the automatic sign in option. Press Win+R keys on the keyboard and type the following:
netplwiz
Then press Enter.
The following window will be displayed:
Check the option called “Users must enter a user name and password to use this computer”.

How to prevent Windows 8 from logging in automatically to the last logged-in user

  1. Download the following ZIP file and extract its contents anywhere you want.
    Download
  2. Right click on the DISABLE_automatic_sign_in.cmd file and choose the “Run as Administrator” menu item.
  3. That’s it! It will set all the necessary registry permissions and values. This will allow you to select the user account before log in.
How to restore defaults and undo this script
Right click on the RESTORE_automatic_sign_in.cmd file and choose the “Run as Administrator” menu item. This will restore the default Windows 8 behavior.
Download
Read More

New keyboard shortcuts for Windows 8 and Windows RT

4:53:00 PM | ,

Here are some of the most useful keyboard shortcuts for Windows.
Press thisTo do this
Windows logo key? Windows logo key+start typing
Search your PC
Ctrl+plus (+) or Ctrl+minus (-)
Zoom in or out of a large number of items, like apps pinned to the Start screen
Ctrl+scroll wheel
Zoom in or out of a large number of items, like apps pinned to the Start screen
Windows logo key? Windows logo key+C
Open the charms
Windows logo key? Windows logo key+F
Open the Search charm to search files
Windows logo key? Windows logo key+H
Open the Share charm
Windows logo key? Windows logo key+I
Open the Settings charm
Windows logo key? Windows logo key+J
Switch the main app and snapped app
Windows logo key? Windows logo key+K
Open the Devices charm
Windows logo key? Windows logo key+O
Lock the screen orientation (portrait or landscape)
Windows logo key? Windows logo key+Q
Open the Search charm to search apps
Windows logo key? Windows logo key+W
Open the Search charm to search settings
Windows logo key? Windows logo key+Z
Show the commands available in the app
Windows logo key? Windows logo key+spacebar
Switch input language and keyboard layout
Windows logo key? Windows logo key+Ctrl+spacebar
Change to a previously selected input
Windows logo key? Windows logo key+Tab
Cycle through open apps (except desktop apps)
Windows logo key? Windows logo key+Ctrl+Tab
Cycle through open apps (except desktop apps) and snap them as they are cycled
Windows logo key? Windows logo key+Shift+Tab
Cycle through open apps (except desktop apps) in reverse order
Windows logo key? Windows logo key+PgUp
Move the Start screen and apps to the monitor on the left (Apps in the desktop won’t change monitors)
Windows logo key? Windows logo key+PgDown
Move the Start screen and apps to the monitor on the right (apps in the desktop won’t change monitors)
Windows logo key? Windows logo key+Shift+period (.)
Snaps an app to the left
Windows logo key? Windows logo key+period (.)
Snaps an app to the right
Read More

List of Windows 8 Shortcuts

4:28:00 PM | , ,

With a paradigm shift in how we look at a Start screen, Windows 8 has added a lot of shortcuts for easier navigation. Check out a long list of shortcuts for Windows 8 to make your life simpler.


Windows key: Switch between Modern Desktop Start screen and the last accessed application
Windows key + C: Access the charms bar
Windows key + Tab: Access the Modern Desktop Taskbar
Windows key + I: Access the Settings charm
Windows key + H: Access the Share charm
Windows key + K: Access the Devices charm
Windows key + Q: Access the Apps Search screen
Windows key + F: Access the Files Search screen
Windows key + W: Access the Settings Search screen
Windows key + P: Access the Second Screen bar
Windows key + Z: Brings up the App Bar when you have a Modern Desktop App running
Windows key + X: Access the Windows Tools Menu
Windows key + O: Lock screen orientation
Windows key + . : Move the screen split to the right
Windows key + Shift + . : Move the screen split to the left
Windows key + V: View all active Toasts/Notifications
Windows key + Shift + V: View all active Toasts/Notifications in reverse order
Windows key + PrtScn: Takes a screenshot of the screen and automatically saves it in the Pictures folder as Screenshot
Windows key + Enter: Launch Narrator    
Windows key + E: Open Computer
Windows key + R: Open the Run dialog box
Windows key + U: Open Ease of Access Center
Windows key + Ctrl + F: Open Find Computers dialog box
Windows key + Pause/Break: Open the System page
Windows key + 1..10: Launch a program pinned on the Taskbar in the position indicated by the number
Windows key + Shift + 1..10: Launch a new instance of a program pinned on the Taskbar in the position indicated by the number
Windows key + Ctrl + 1..10: Access the last active instance of a program pinned on the Taskbar in the position indicated by the number
Windows key + Alt + 1..10: Access the Jump List of a program pinned on the Taskbar in the position indicated by the number
Windows key + B: Select the first item in the Notification Area and then use the arrow keys to cycle through the items Press Enter to open the selected item
Windows key + Ctrl + B: Access the program that is displaying a message in the Notification Area
Windows key + T: Cycle through the items on the Taskbar
Windows key + M: Minimize all windows
Windows key + Shift + M: Restore all minimized windows
Windows key + D: Show/Hide Desktop (minimize/restore all windows)
Windows key + L: Lock computer
Windows key + Up Arrow: Maximize current window
Windows key + Down Arrow: Minimize/restore current window
Windows key + Home: Minimize all but the current window
Windows key + Left Arrow: Tile window on the left side of the screen
Windows key + Right Arrow: Tile window on the right side of the screen
Windows key + Shift + Up Arrow: Extend current window from the top to the bottom of the screen
Windows key + Shift + Left/Right Arrow: Move the current window from one monitor to the next
Windows key + F1: Launch Windows Help and Support
PageUp: Scroll forward on the Modern Desktop Start screen
PageDown: Scroll backward on the Modern Desktop Start screen
Esc: Close  a charm
Ctrl + Esc: Switch between Modern Desktop Start screen and the last accessed application
Ctrl + Mouse scroll wheel: Activate the Semantic Zoom on the Modern Desktop screen
Alt: Display a hidden Menu Bar
Alt + D: Select the Address Bar
Alt + P: Display the Preview Pane in Windows Explorer
Alt + Tab: Cycle forward through open windows
Alt + Shift + Tab: Cycle backward through open windows
Alt + F: Close the current window Open the Shut Down Windows dialog box from the Desktop
Alt + Spacebar: Access the Shortcut menu for current window
Alt + Esc: Cycle between open programs in the order that they were opened
Alt + Enter: Open the Properties dialog box of the selected item
Alt + PrtScn: Take a screen shot of the active Window and place it in the clipboard
Alt + Up Arrow: Move up one folder level in Windows Explorer (Like the Up Arrow in XP)
Alt + Left Arrow: Display the previous folder
Alt + Right Arrow: Display the next folder
Shift + Insert: CD/DVD Load CD/DVD without triggering Autoplay or Autorun
Shift + Delete: Permanently delete the item (rather than sending it to the Recycle Bin)
Shift + F6: Cycle backward through elements in a window or dialog box
Shift + F10: Access the context menu for the selected item
Shift + Tab: Cycle backward through elements in a window or dialog box
Shift + Click: Select a consecutive group of items
Shift + Click on a Taskbar button: Launch a new instance of a program
Shift + Right-click on a Taskbar button: Access the context menu for the selected item
Ctrl + A: Select all items
Ctrl + C: Copy the selected item
Ctrl + X: Cut the selected item
Ctrl + V: Paste the selected item
Ctrl + D: Delete selected item
Ctrl + Z: Undo an action
Ctrl + Y: Redo an action
Ctrl + N: Open a new window in Windows Explorer
Ctrl + W: Close current window in Windows Explorer
Ctrl + E: Select the Search box in the upper right corner of a window
Ctrl + Shift + N: Create new folder
Ctrl + Shift + Esc: Open the Windows Task Manager
Ctrl + Alt + Tab: Use arrow keys to cycle through open windows
Ctrl + Alt + Delete: Access the Windows Security screen
Ctrl + Click: Select multiple individual items
Ctrl + Click and drag an item: Copies that item in the same folder
Ctrl + Shift + Click and drag an item: Creates a shortcut for that item in the same folder
Ctrl + Tab:  Move forward through tabs
Ctrl + Shift + Tab: Move backward through tabs
Ctrl + Shift + Click on a Taskbar button: Launch a new instance of a program as an Administrator
Ctrl + Click on a grouped Taskbar button: Cycle through the instances of a program in the group
F1: Display Help
F2: Rename a file
F3: Open Search
F4: Display the Address Bar list
F5: Refresh display
F6: Cycle forward through elements in a window or dialog box
F7: Display command history in a Command Prompt
F10: Display hidden Menu Bar
F11: Toggle full screen display
Tab: Cycle forward through elements in a window or dialog box
PrtScn: Take a screen shot of the entire screen and place it in the clipboard
Home: Move to the top of the active window
End: Move to the bottom of the active window
Delete: Delete the selected item
Backspace: Display the previous folder in Windows Explorer  Move up one folder level in Open or Save dialog box
Esc: Close a dialog box
Num Lock Enabled + Plus (+): Display the contents of the selected folder
Num Lock Enabled + Minus (-): Collapse the selected folder
Num Lock Enabled + Asterisk (*): Expand all subfolders under the selected folder    
Press Shift 5 times Turn StickyKeys on or off
Hold down right Shift for 8 seconds Turn FilterKeys on or off
Hold down Num Lock for 5 seconds Turn ToggleKeys on or off
Read More