Advertise with me..................................

Your Ads Here..................................

Just for my note..................................

You can read but don't do negative..................................

You get +, then don't do - ..................................

Showing posts with label computer. Show all posts

How to Fix ‘File Path Too Long’ Error

7:13:00 PM | , , , , , ,


How to Fix ‘File Path Too Long’ Error While Copying, Deleting or Opening Files, Without Using Third Party Applications
Here I Fix ‘File Path Too Long’ Error While Copying, Deleting or Opening Files. ‘File Path Too Long’ Error is an error that when you try to copy something. So, it happens when you copy any file and then just try to paste it. This error stops you from the copying process and you can’t complete the process. This happens due to the pre-defined character limit and beyond this limit you cannot name any file or other stuffs. Mostly the character range is 256-260 characters. The important thing is that the character limit is for the file path and the file paths are too long if the file is too deep behind the folders and folders and hence the error occurs. Now lets see the solution to this error.
Step 1:

The first easy thing is that you just shorten the file and the folder names coming along the path to reduce the characters length.

Step 2:

Now open the command prompt and type the below command:
subst J: “the file path you want to shorten”
In above command in place of “J” you can write any drive letter.

Step 3:

Now open the J drive and just copy the data from there.
Note: Now to remove the new drive J just type subst J: /d in command prompt.
That’s it.

==================
Why does it come?
There is a pre-defined character limit beyond which you cannot name a file or folder, and it varies from one OS to another. Mostly it varies between 256 and 260 characters. This is the character limit for a file name, which excludes the file path under which it is located, like “C:\Documents and Settings\Test User\Desktop\test file.txt”. But, when you copy a file from one location, it takes into account the entire file path. So, if the file is residing under a folder which is too deep or too long, that has a length beyond the set-limit, you will get errors like the ones shown above.
How do I know that the file path length is causing the issue?
  • One way you will know is definitely from the error messages similar to the ones above which clearly mentions the problem.
  • Some other times, it won’t. You will simply get a message saying ‘Cannot Copy’ in the title.
  • Or, some other times, the files won’t open properly. They would open and close instantly without giving any errors.
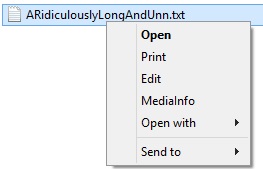
  • Also when you right-click such files, the number of options available in the right-click menu would also be limited compared to other files.
Error 4
All these are caused by those incredibly long file paths.
So, how can I copy the files or fix this issue?
There are a couple of ways you can fix this easily without the use of any 3rd party applications.
  1. Check the folder path, and shorten some of the folder names in between thereby reducing the file path length. You don’t necessarily need to put the folder name as ‘Mission Impossible Three’ when you can still recognize it as ‘MI 3.’
  2. The main thing many people miss when they save a file or folder their Desktop is that the actual path to that folder in desktop is either ‘C:\Documents and Settings\%username%\Desktop’ or ‘C:\Users\%username%\Desktop’ depending on your OS. So as you can see, its already longer than you thought it is. Go to Start — Run and type ‘cmd‘ and press OK, or click start/press windows key and type ‘Command Prompt‘. Once in the command prompt window, type the following command :
subst V: “C:\TheRidiculouslyLongFolderNameWhichYouDontNeedAtAll” ,
where
subst = substitute command
V = a drive letter of my choice, you can select your own.
C:\TheRidiculouslyLongFolderNameWhichYouDontNeedAtAll = the file path you want to shorten. Change it according to your situation.
Error Fix Command
So, basically this command would convert the entire folder path you provide in the command, into a single temporary drive letter, like V in this case, which gets created in My Computer. Now all you need to do is, go to the My Computer, and open the V drive, and copy the data from there.
After the Fix to File Path Error
Note : To remove the new drive from My Computer, go to Command Prompt again and type subst V: /d
Read More

Troubleshooting macOS Sierra Problems

2:31:00 PM | ,

If you need to reset the SMC!” You have tried rebooting, you’ve reset the PRAM,

If you need to reset the SMC!” You have tried rebooting, you’ve reset the PRAM,
Here's how to reset your PRAM:
Shut down your machine. Yes, all the way down, not sleep or logging out.
Press the power button and then press command-option-p-r. ...
Hold those keys down until your Mac reboots again and you here the startup chime.
 you’ve done it all, but your Mac is still behaving strangely. What next? In certain circumstances, resetting your Mac System Management Controller (SMC) can be a solution. This is sometimes necessary to restore normal lower level system functionality to your Mac, particularly for power and hardware related troubles.

We’ll show you exactly how to reset the SMC on any type of Mac (and any version of OS X) and the type of problems that it may resolve.

When & Why Reset SMC on a Mac?
Typically, an SMC reset helps to resolve many power and hardware related issues that are otherwise unresponsive to troubleshooting techniques. Resetting a Mac SMC is particularly effective if you’re having the following types of problems:
* Issues with your Mac cooling fans and fan management: the fans run constantly at high speed, fans run high despite low CPU usage and adequate ventilation, fans not working at all, etc
* Power management and battery problems: Mac isn’t turning on, sleep isn’t working, random shutdowns and reboots, battery isn’t charging, Mac won’t wake from sleep, etc
* Light problems and improper lighting management: battery indicator lights aren’t working, display backlighting isn’t adjusting to ambient light changes, keyboard backlights not working, etc
* Video and external displays not working: display brightness functionality not working properly, target video mode isn’t working properly, external display isn’t working, etc
* General performance and functionality problems: abnormally sluggish behavior despite no CPU or disk usage, external ports not working, airport & bluetooth aren’t showing up, external devices are not being found, etc

Reset SMC of a MacBook Air, MacBook Pro Retina, or MacBook Pro’s with an internal non-removable battery
This is how to reset SMC on most modern Mac laptops, none of which have a removable battery:
  1. Shutdown your MacBook Air / MacBook Pro 
  2. Connect the power adapter to the Mac 
  3. On the MacBook / Pro’s keyboard, hold down the Shift+Control+Option keys and the Power button at the same time 
  4. Release all keys and the power button at the same time – the little light on the MagSafe adapter may change colors briefly to indicate the SMC has reset 
  5. Boot your Mac as usual 
Here’s the key sequence to hold down:

Do keep in mind that by resetting the SMC you will lose power specific settings, like the time it takes to sleep a Mac and other customizations to power settings. No big deal, but if you have made many changes to your hardware behavior you will want to adjust stuff like sleep behavior again.
The boot time after resetting a machines SMC can be a bit longer than usual, that is normal.


Reset SMC of an iMac, Mac Pro, Mac Mini
Resetting SMC is different for non-portable Macs.
On any desktop Mac, here is how you reset the System Management Controller:
  1. Shut down your Mac 
  2. Disconnect the power cord 
  3. Press and hold the Mac’s power button for 5 seconds 
  4. Release the button 
  5. Reattach the power cables and boot the Mac as usual 
Reset the SMC of a MacBook or MacBook Pro’s with detachable batteries

Older MacBook laptops, indicated by having a removable battery, can reset SMC with the following approach:
  1. Shutdown the MacBook/Pro and remove the battery 
  2. Disconnect the power adapter, hold the Power Key for 10 seconds 
  3. Release the power key and reconnect your battery and power adapter 
  4. Turn your Mac on 
  5. Let boot as usual 
What is SMC anyway?
SMC stands for System Management Controller, a critical low-level component on Mac hardware. Much like the name sounds, the SMC controls and managements system hardware for power consumption, battery charging and battery function, thermal activity and fan activity, LED lighting for keyboards and displays, GPU functionality with video mode changes and video output, sleep and wake, and other core hardware functionality on a Mac.
Read More

HDMI Output Problems in Windows

11:24:00 AM | , , , , ,

If you upgrade/downgrade your system and getting trouble with your HDMI output,

Rollback to the older driver

Open Device Manager and find the driver that is giving you trouble.
Right click it and choose Rollback driver to install the previous version of the driver.

Sometimes, it’s better to use the default driver than the newer version of driver. (sometimes, your system do not support newer of latest driver.) 

To use the default driver you’ll need to uninstall the current one you’re using and the default one will install itself. To uninstall the driver, do this:
  1) Open Device manager and find the buggy driver.
  2) Right click it and choose Uninstall.
  3) Check Delete the driver software for this device and click OK.
  4) Restart your computer.

(or)

Sometimes, your driver is getting old and you need to update a newer or latest version.

Read More

Laptop PC Touchpad Not Working

11:02:00 AM | , ,

To check for Touchpad on or off,
open the PC settings screen
press Windows Key + C 
or 
swipe in from the right,
tap Settings, and tap Change PC settings.
Navigate to PC and devicesMouse and touchpad
 and ensure the Touchpad option is enabled.

Read More

How To Fix Operating System Not Found or Missing Operating System

5:26:00 AM | , ,

Step 1:

Step 2:

Attach bootable USB or DVD into your computer.

Step 3:

After step 2 using the function keys (F2, F12 and Delete) enter the BIOS setup.

Step 4:

Then click on Repair Your Computer below the Install Now button.

Step 5:

In Repair Your Computer Open CMD (Command Prompt).

Step 6:

In CMD type “diskpart” then type “list volume”

Step 7:

In list volume, all volumes are shown, then find your system volume where the windows are installed and type “select volume ###“(system volume C) shows on CMD. Ex. select volume 3

Step 8:

After selection of volume, type “ACTIVE“. Your system partition is active now. Type ”exit” to leave diskpart and again ”exit” to close cmd. That’s it now RESTART your computer.

Conclusion

Above solution is working 100% if you follow steps correctly. If you have problem during following above steps, then please comment below.
Read More

How to Use Zawgyi-One Font on Windows 8+

5:57:00 PM | , ,

  1. First download Zawgyi One Font and Zawgyi Typing keyboard from the link below. 
  2. Install Zawgyi One Font and Zawgyi typing Keyboard Setup.
  3. Then, install  IEZawGyiGtalkfont
  4. Control Panel >> All Control Panel Items >>> Language ... 
  5.  Go to Advaced Settings >>> click here for more>>>

Read More

Windows 7 Command Prompt Commands

9:42:00 AM | , ,

An A-Z Index of the Windows CMD command line

   ADDUSERS Add or list users to/from a CSV file
   ADmodcmd Active Directory Bulk Modify
   ARP      Address Resolution Protocol
   ASSOC    Change file extension associations•
   ASSOCIAT One step file association
   AT       Schedule a command to run at a specific time
   ATTRIB   Change file attributes
b
   BCDBOOT  Create or repair a system partition
   BCDEDIT  Manage Boot Configuration Data
   BITSADMIN Background Intelligent Transfer Service
   BOOTCFG  Edit Windows boot settings
   BROWSTAT Get domain, browser and PDC info
c
   CACLS    Change file permissions
   CALL     Call one batch program from another•
   CERTREQ  Request certificate from a certification authority
   CERTUTIL Utility for certification authority (CA) files and services
   CD       Change Directory - move to a specific Folder•
   CHANGE   Change Terminal Server Session properties
   CHKDSK   Check Disk - check and repair disk problems
   CHKNTFS  Check the NTFS file system
   CHOICE   Accept keyboard input to a batch file
   CIPHER   Encrypt or Decrypt files/folders
   CleanMgr Automated cleanup of Temp files, recycle bin
   CLIP     Copy STDIN to the Windows clipboard
   CLS      Clear the screen•
   CMD      Start a new CMD shell
   CMDKEY   Manage stored usernames/passwords
   COLOR    Change colors of the CMD window•
   COMP     Compare the contents of two files or sets of files
   COMPACT  Compress files or folders on an NTFS partition
   COMPRESS Compress one or more files
   CONVERT  Convert a FAT drive to NTFS
   COPY     Copy one or more files to another location•
   Coreinfo Show the mapping between logical & physical processors
   CSCcmd   Client-side caching (Offline Files)
   CSVDE    Import or Export Active Directory data 
d
   DATE     Display or set the date•
   DEFRAG   Defragment hard drive
   DEL      Delete one or more files•
   DELPROF  Delete user profiles
   DELTREE  Delete a folder and all subfolders
   DevCon   Device Manager Command Line Utility 
   DIR      Display a list of files and folders•
   DIRQUOTA File Server Resource Manager Disk quotas
   DIRUSE   Display disk usage
   DISKPART Disk Administration
   DISKSHADOW Volume Shadow Copy Service
   DISKUSE  Show the space used in folders
   DOSKEY   Edit command line, recall commands, and create macros
   DriverQuery Display installed device drivers
   DSACLs   Active Directory ACLs
   DSAdd    Add items to active directory (user group computer) 
   DSGet    View items in active directory (user group computer)
   DSQuery  Search for items in active directory (user group computer)
   DSMod    Modify items in active directory (user group computer)
   DSMove   Move an Active directory Object
   DSRM     Remove items from Active Directory
e
   ECHO     Display message on screen•
   ENDLOCAL End localisation of environment changes in a batch file•
   ERASE    Delete one or more files•
   EVENTCREATE Add a message to the Windows event log
   EXIT     Quit the current script/routine and set an errorlevel•
   EXPAND   Uncompress CAB files
   EXTRACT  Uncompress CAB files
f
   FC       Compare two files
   FIND     Search for a text string in a file
   FINDSTR  Search for strings in files
   FOR /F   Loop command: against a set of files•
   FOR /F   Loop command: against the results of another command•
   FOR      Loop command: all options Files, Directory, List•
   FORFILES Batch process multiple files
   FORMAT   Format a disk
   FREEDISK Check free disk space
   FSUTIL   File and Volume utilities
   FTP      File Transfer Protocol
   FTYPE    File extension file type associations•
g
   GETMAC   Display the Media Access Control (MAC) address
   GOTO     Direct a batch program to jump to a labelled line•
   GPRESULT Display Resultant Set of Policy information
   GPUPDATE Update Group Policy settings
h
   HELP     Online Help
   HOSTNAME Display the host name of the computer
i
   iCACLS   Change file and folder permissions
   IEXPRESS Create a self extracting ZIP file archive
   IF       Conditionally perform a command•
   IFMEMBER Is the current user a member of a group
   IPCONFIG Configure IP
   INUSE    Replace files that are in use by the OS
l
   LABEL    Edit a disk label
   LOGMAN   Manage Performance Monitor logs
   LOGOFF   Log a user off
   LOGTIME  Log the date and time in a file
m
   MAKECAB  Create .CAB files
   MAPISEND Send email from the command line
   MBSAcli  Baseline Security Analyzer
   MEM      Display memory usage
   MD       Create new folders•
   MKLINK   Create a symbolic link (linkd) •
   MODE     Configure a system device COM/LPT/CON
   MORE     Display output, one screen at a time
   MOUNTVOL Manage a volume mount point
   MOVE     Move files from one folder to another•
   MOVEUSER Move a user from one domain to another
   MSG      Send a message
   MSIEXEC  Microsoft Windows Installer
   MSINFO32 System Information
   MSTSC    Terminal Server Connection (Remote Desktop Protocol)
n
   NET      Manage network resources
   NETDOM   Domain Manager
   NETSH    Configure Network Interfaces, Windows Firewall & Remote access
   NBTSTAT  Display networking statistics (NetBIOS over TCP/IP)
   NETSTAT  Display networking statistics (TCP/IP)
   NLSINFO  Display locale information (reskit).
   NLTEST   Network Location Test (AD)
   NOW      Display the current Date and Time 
   NSLOOKUP Name server lookup
   NTBACKUP Backup folders to tape
   NTDSUtil Active Directory Domain Services management
   NTRIGHTS Edit user account rights
   NVSPBIND Modify network bindings
o
   OPENFILES Query or display open files
p
   PATH     Display or set a search path for executable files•
   PATHPING Trace route plus network latency and packet loss
   PAUSE    Suspend processing of a batch file and display a message•
   PERMS    Show permissions for a user
   PERFMON  Performance Monitor
   PING     Test a network connection
   POPD     Return to a previous directory saved by PUSHD•
   PORTQRY  Display the status of ports and services
   POWERCFG Configure power settings
   PRINT    Print a text file
   PRINTBRM Print queue Backup/Recovery
   PRNCNFG  Configure or rename a printer
   PRNMNGR  Add, delete, list printers and printer connections
   ProcDump Monitor an application for CPU spikes
   PROMPT   Change the command prompt•
   PsExec     Execute process remotely
   PsFile     Show files opened remotely
   PsGetSid   Display the SID of a computer or a user
   PsInfo     List information about a system
   PsKill     Kill processes by name or process ID
   PsList     List detailed information about processes
   PsLoggedOn Who's logged on (locally or via resource sharing)
   PsLogList  Event log records
   PsPasswd   Change account password
   PsPing     Measure network performance
   PsService  View and control services
   PsShutdown Shutdown or reboot a computer
   PsSuspend  Suspend processes
   PUSHD    Save and then change the current directory•
q
   QGREP    Search file(s) for lines that match a given pattern
   Query Process / QPROCESS  Display processes
   Query Session / QWinsta   Display all sessions (TS/Remote Desktop)
   Query TermServer /QAppSrv List all servers (TS/Remote Desktop)
   Query User    / QUSER     Display user sessions (TS/Remote Desktop)
r
   RASDIAL  Manage RAS connections
   RASPHONE Manage RAS connections
   RECOVER  Recover a damaged file from a defective disk
   REG      Registry: Read, Set, Export, Delete keys and values
   REGEDIT  Import or export registry settings
   REGSVR32 Register or unregister a DLL
   REGINI   Change Registry Permissions
   REM      Record comments (remarks) in a batch file•
   REN      Rename a file or files•
   REPLACE  Replace or update one file with another
   Reset Session  Delete a Remote Desktop Session
   RD       Delete folder(s)•
   RMTSHARE Share a folder or a printer
   ROBOCOPY Robust File and Folder Copy
   ROUTE    Manipulate network routing tables
   RUN      Start | RUN commands
   RUNAS    Execute a program under a different user account
   RUNDLL32 Run a DLL command (add/remove print connections)

s
   SC       Service Control
   SCHTASKS Schedule a command to run at a specific time
   SET      Display, set, or remove session environment variables•
   SETLOCAL Control the visibility of environment variables•
   SetSPN   Edit Service Principal Names
   SETX     Set environment variables
   SFC      System File Checker 
   SHARE    List or edit a file share or print share
   ShellRunAs Run a command under a different user account
   SHIFT    Shift the position of batch file parameters•
   SHORTCUT Create a windows shortcut (.LNK file)
   SHUTDOWN Shutdown the computer
   SLEEP    Wait for x seconds
   SLMGR    Software Licensing Management (Vista/2008)
   SORT     Sort input
   START    Start a program, command or batch file•
   STRINGS  Search for ANSI and UNICODE strings in binary files
   SUBINACL Edit file and folder Permissions, Ownership and Domain
   SUBST    Associate a path with a drive letter
   SYSMON   Monitor and log system activity to the Windows event log
   SYSTEMINFO List system configuration
t
   TAKEOWN  Take ownership of a file
   TASKLIST List running applications and services
   TASKKILL End a running process
   TELNET   Communicate with another host using the TELNET protocol
   TIME     Display or set the system time•
   TIMEOUT  Delay processing of a batch file
   TITLE    Set the window title for a CMD.EXE session•
   TLIST    Task list with full path
   TOUCH    Change file timestamps    
   TRACERT  Trace route to a remote host
   TREE     Graphical display of folder structure
   TSDISCON Disconnect a Remote Desktop Session
   TSKILL   End a running process
   TSSHUTDN Remotely shut down or reboot a terminal server
   TYPE     Display the contents of a text file•
   TypePerf Write performance data to a log file
   TZUTIL   Time Zone Utility
v
   VER      Display version information•
   VERIFY   Verify that files have been saved•
   VOL      Display a disk label•
w
   W32TM    Time Service
   WAITFOR  Wait for or send a signal
   WEVTUTIL Clear event logs, enable/disable/query logs
   WHERE    Locate and display files in a directory tree
   WHOAMI   Output the current UserName and domain
   WINDIFF  Compare the contents of two files or sets of files
   WINRM    Windows Remote Management
   WINRS    Windows Remote Shell
   WMIC     WMI Commands
   WUAUCLT  Windows Update
x
   XCACLS   Change file and folder permissions
   XCOPY    Copy files and folders
   ::       Comment / Remark•
Commands marked • are Internal commands only available within the CMD shell.
All other commands (not marked with •) are external commands.
External commands may be used under the CMD shell, PowerShell, or directly from START-RUN.   Technology Lists
Read More

Windows Host Process Rundll32 has stopped working

2:52:00 PM | , ,

Windows Host Process Rundll32 has stopped working
If you get this error message frequently, here are a few troubleshooting steps you may try:
1] First and foremost, ensure that your Windows is fully updated.
2] If you get the error when opening folders that contain video files, turn off thumbnails view and see if it helps:
Open Control Panel > Folder Options > Always show Icons, Never Thumbnails
3] Try to remember, when did this error start popping up.
Was it after installing a particular program? Was it after installing, say, Nero ? if yes try this:
Open Computer > System Drive > Program files > Common Files > Ahead > DSfilter. Rename “NeroVideoProc.ax” to say “1NeroVideoProc.ax”. Also rename “NeVideo.ax” to say “1NeVideo.ax”
Reboot.
Maybe you could update or uninstall Nero software and see if it helps.
4] The Intel ViiV software and the K-Lite Codec Pack too are known to cause this problem. If you have installed any of them, update them or uninstall them and see if it helps.
5] Follow these steps to try and find out, which software is causing this issue.
Run msconfig to open up the System Configuration Utility window. Click on Services, and check in the “Hide all Microsoft services” check box. Click on “Disable All” button.
Now click on “Startup” tab, and then click on “Disable All” button again. Press OK button and then “Restart” button on the following window.
Effectively, you have turned off all non-Microsoft services and start ups.
If the issue is resolved, open System Configuration Windows again and then enable all the services from Services tab and then check the issue after restarting the computer in the same way as mentioned above disabling one service at a time.
6] Turn off Data Execution Prevention and see if it helps. But remember that this is a security feature that is there to help protect your computer.
7] Run the Microsoft Windows File and Folder Troubleshooter and see if it helps.
This way, you will have to enable/disable services and start ups to narrow down on the culprit. Agreed, this is a lengthy and painfully boring process, but it will help you identify the culprit.
Read More

What is and how to remove "VCSystem Tray has stopped working" message?

9:40:00 AM |

Q: I keep getting a message that says "VC System Tray has stopped working".

A: it is in fact a Vaio Care error message, and downloading the update from Sony support will fix the problem. Just download VAIOCare Software and Install it.

What Is VAIOCare.exe?

VAIOCare.exe is a type of EXE file associated with VAIOShellStarter.exe developed by Sony Corporation for the Windows Operating System. The latest known version of VAIOCare.exe is 7.0.0.7070, which was produced for Windows. This EXE file carries a popularity rating of 1 stars and a security rating of "UNKNOWN".

What Are EXE Files?

EXE ("executable") files, such as VAIOCare.exe, are files that contain step-by-step instructions that a computer follows to carry out a function. When you "double-click" an EXE file, your computer automatically executes these instructions designed by a software developer (eg. Sony Corporation) to run a program (eg. VAIOShellStarter.exe) on your PC.
Every software application on your PC uses an executable file - your web browser, word processor, spreadsheet program, etc. - making it one of the most useful kinds of files in the Windows operating system. Without executable files like VAIOCare.exe, you wouldn't be able to use any programs on your PC.

Why Do I Have EXE Errors?

Because of their usefulness and ubiquity, EXE files are commonly used as a method of delivery for virus / malware infection. Often, viruses will be disguised as a benign EXE file (such as VAIOCare.exe) and distributed through SPAM email or malicious websites, which can then infect your computer when executed (eg. when you double-click the EXE file).
In addition, viruses can infect, replace, or corrupt existing EXE files, which can then lead to error messages when VAIOShellStarter.exe or related programs are executed. Thus, any executable files that you download to your PC should be scanned for viruses before opening - even if you think it is from a reputable source.

When Do EXE Errors Occur?

EXE errors, such as those associated with VAIOCare.exe, most often occur during computer startup, program startup, or while trying to use a specific function in your program (eg. printing).

Common VAIOCare.exe Error Messages

The most common VAIOCare.exe errors that can appear on a Windows-based computer are:
  • "VAIOCare.exe Application Error."
  • "VAIOCare.exe is not a valid Win32 application."
  • "VAIOCare.exe has encountered a problem and needs to close. We are sorry for the inconvenience."
  • "Cannot find VAIOCare.exe."
  • "VAIOCare.exe not found."
  • "Error starting program: VAIOCare.exe."
  • "VAIOCare.exe is not running."
  • "VAIOCare.exe failed."
  • "Faulting Application Path: VAIOCare.exe."
These EXE error messages can appear during program installation, while a VAIOCare.exe-related software program (eg. VAIOShellStarter.exe) is running, during Windows startup or shutdown, or even during the installation of the Windows operating system. Keeping track of when and where your VAIOCare.exe error occurs is a critical piece of information in troubleshooting the problem. 

Causes of VAIOCare.exe Errors

VAIOCare.exe problems can be attributed to corrupt or missing files, invalid registry entries associated with VAIOCare.exe, or a virus / malware infection.
More specifically, these VAIOCare.exe errors can be caused by:
  • Corrupt Windows registry keys associated with VAIOCare.exe / VAIOShellStarter.exe.
  • Virus or malware infection that has corrupted the VAIOCare.exe file or related VAIOShellStarter.exe program files.
  • Another program maliciously or mistakenly deleted VAIOCare.exe-related files.
  • Another program is in conflict with VAIOShellStarter.exe and its shared referenced files.
  • Corrupt download or incomplete installation of VAIOShellStarter.exe software.


How To Fix VAIOCare.exe Errors

Caution: We do not recommend downloading VAIOCare.exe from "EXE download" sites. These sites distribute EXE files that are unapproved by the official VAIOCare.exe file developer, and can often be bundled with virus-infected or other malicious files. If you require a copy of VAIOCare.exe, it is recommended that you obtain it directly from Sony Corporation.
Below is a list of troubleshooting steps to resolve your VAIOCare.exe problems. These troubleshooting steps get progressively more difficult and time consuming, so we strongly recommend attempting them in ascending order to avoid unnecessary time and effort.

Step 1: Repair Registry Entries Associated with VAIOShellStarter.exe


Sometimes VAIOCare.exe and other EXE system errors can be related to problems in the Windows registry. Several programs can share the same VAIOCare.exe file, but when these programs are uninstalled or changed, sometimes "orphaned" (invalid) EXE registry entries are left behind.
Basically, what this means is that while the actual file path may have changed, its incorrect former location is still recorded in the Windows registry. When Windows tries looking up these incorrect file references (file locations on your PC), VAIOCare.exe errors can occur. In addition, malware infection may have corrupted the registry entries associated with VAIOShellStarter.exe. Thus, these invalid EXE registry entries need to be repaired to fix the root of the problem.
Manually editing the Windows registry to remove invalid VAIOCare.exe keys is not recommended unless you are PC service professional. Incorrectly editing your registry can stop your PC from functioning and create irreversible damage to your operating system. In fact, one misplaced comma can prevent your PC from booting entirely!
Because of this risk, we highly recommend using a trusted registry cleaner such as WinThruster (Developed by Microsoft Gold Certified Partner) to scan and repair any VAIOCare.exe-related registry problems. Using a registry cleaner automates the process of finding invalid registry entries, missing file references (like the one causing your VAIOCare.exe error), and broken links within the registry. A backup is automatically created before each scan, with the ability to undo any changes in a single click, protecting you against the possibility of PC damage. The best part is that repairing registry errors can also dramatically improve system speed and performance.

Caution: Unless you an advanced PC user, we DO NOT recommend editing the Windows registry manually. Using Registry Editor incorrectly can cause serious problems that may require you to reinstall Windows. We do not guarantee that problems resulting from the incorrect use of Registry Editor can be solved. Use Registry Editor at your own risk.
To manually repair your Windows registry, first you need to create a backup by exporting a portion of the registry related to VAIOCare.exe (eg. VAIOShellStarter.exe):
  1. Click the Start button.
  2. Type "command" in the search box... DO NOT hit ENTER yet!
  3. While holding CTRL-Shift on your keyboard, hit ENTER.
  4. You will be prompted with a permission dialog box.
  5. Click Yes.
  6. A black box will open with a blinking cursor.
  7. Type "regedit" and hit ENTER.
  8. In the Registry Editor, select the VAIOCare.exe-related key (eg. VAIOShellStarter.exe) you want to back up.
  9. From the File menu, choose Export.
  10. In the Save In list, select the folder where you want to save the VAIOShellStarter.exe backup key.
  11. In the File Name box, type a name for your backup file, such as "VAIOShellStarter.exe Backup".
  12. In the Export Range box, be sure that "Selected branch" is selected.
  13. Click Save.
  14. The file is then saved with a .reg file extension.
  15. You now have a backup of your VAIOCare.exe-related registry entry.
The next steps in manually editing your registry will not be discussed in this article due to the high risk of damaging your system. If you would like to learn more about manual registry editing, please see the links below.

We do not claim any responsibility for the results of the actions taken from the content linked below - complete these tasks at your own risk.

Step 2: Conduct a Full Malware Scan of Your PC


There is a chance that your VAIOCare.exe error could be related to a malware infection on your PC. These malicious intruders can damage, corrupt, or even delete EXE-related files. Furthermore, there's a possibility that the VAIOCare.exe error you are experiencing is related to a component of the malicious program itself.

Tip: If you do not already have a malware protection program installed, we highly recommend using Emsisoft Anti-Malware (download here). They offer a malware removal guarantee that is not offered by other security software.

Step 3: Clean Out Your System Junk (Temporary Files and Folders) With Disk Cleanup (cleanmgr)


Over time, your computer accumulates junk files from normal web surfing and computer use. If this junk isn't occasionally cleaned out, it can cause VAIOShellStarter.exe to respond slowly or provides an VAIOCare.exe error, possibly due to file conflicts or an overloaded hard drive. Cleaning up these temporary files with Disk Cleanup might not only solve your VAIOCare.exe error, but can also dramatically speed up the performance of your PC.

Tip: Although Disk Cleanup is a wonderful built-in tool, it will not completely clean up all of the temporary files on your computer. Other programs that you frequently use such Microsoft Office, Firefox, Chrome, Live Messenger, and hundreds of other programs are not cleaned up with Disk Cleanup (including some Sony Corporation programs).

Because of the shortcomings of the Windows Disk Cleanup (cleanmgr) tool, we highly recommend using a specialized hard drive cleanup / privacy protection software such as WinSweeper (Developed by Microsoft Gold Partner) to clean up your entire computer. Running WinSweeper once per day (using automatic scanning) will ensure that your computer is always clean, running fast, and free of VAIOCare.exe errors related to temporary files.
How to run Disk Cleanup (cleanmgr) (Windows XP, Vista, 7, and 8):
  1. Click the Start button.
  2. Type "command" in the search box... DO NOT hit ENTER yet!
  3. While holding CTRL-Shift on your keyboard, hit ENTER.
  4. You will be prompted with a permission dialog box.
  5. Click Yes.
  6. A black box will open with a blinking cursor.
  7. Type "cleanmgr" and hit ENTER.
  8. Disk Cleanup will begin calculating how much occupied disk space you can reclaim.
  9. The Disk Cleanup dialog box will appear with series of checkboxes you can select. In most cases, the "Temporary Files" category will occupy the most disk space.
  10. Check the boxes of the categories you want to clean and click OK.

Step 4: Update Your PC Device Drivers


VAIOCare.exe errors can be related to corrupt or outdated device drivers. Drivers can work one day, and suddenly stop working the next day, for a variety of reasons. The good news is that you can often update the device driver to fix the EXE problem.
Finding the exact driver for your VAIOCare.exe-related hardware device can be extremely difficult, even directly on the Sony Corporation or related manufacturer's website. Even if you are experienced at finding, downloading, and manually updating drivers, the process can still be very time consuming and extremely irritating. Installing the wrong driver, or simply an incompatible version of the right driver, can make your problems even worse.
Because of the time and complexity involved in updating drivers, we highly recommend using a driver update tool such as DriverDoc (Developed by Microsoft Gold Partner) to automate the process.
DriverDoc updates all of your PC device drivers, not just those associated with your EXE error. DriverDoc's proprietary One-Click Update™ technology not only ensures that you have correct driver versions for your hardware, but it also creates a backup of your current drivers before making any changes. Maintaining a driver backup provides you with the security of knowing that you can rollback any driver to a previous version if necessary. With updated device drivers, you can finally unlock new hardware features and improve the speed and performance of your PC.

Please Note: Your VAIOCare.exe may not be related to hardware driver problems, but it's always a good idea to ensure all of your PC device drivers are up-to-date to maximize PC performance.

Step 5: Utilize Windows System Restore to "Undo" Recent System Changes


Windows System Restore allows you to "go back in time" with your PC to help fix your VAIOCare.exe problems. System Restore can return your PC's system files and programs back to a time when everything was working fine. This can potentially help you avoid hours of troubleshooting headaches associated with EXE errors.

Please Note: Using System Restore will not affect your documents, pictures, or other data.
To use System Restore (Windows XP, Vista, 7, and 8):
  1. Click the Start button.
  2. In the search box, type "System Restore" and hit ENTER.
  3. In the results, click System Restore.
  4. Enter any administrator passwords (if prompted).
  5. Follow the steps in the Wizard to choose a restore point.
  6. Restore your computer.

Step 6: Uninstall and Reinstall the VAIOShellStarter.exe Program Associated with VAIOCare.exe


If your VAIOCare.exe error is related to a specific program, reinstalling VAIOShellStarter.exe-related software could be the answer.
Instructions for Windows 7 and Windows Vista:
  1. Open Programs and Features by clicking the Start button.
  2. Click Control Panel on the right side menu.
  3. Click Programs.
  4. Click Programs and Features.
  5. Locate VAIOCare.exe-associated program (eg. VAIOShellStarter.exe) under the Name column.
  6. Click on the VAIOShellStarter.exe-associated entry.
  7. Click the Uninstall button on the top menu ribbon.
  8. Follow the on-screen directions to complete the uninstallation of your VAIOCare.exe-associated program.
Instructions for Windows XP:
  1. Open Programs and Features by clicking the Start button.
  2. Click Control Panel.
  3. Click Add or Remove Programs.
  4. Locate VAIOCare.exe-associated program (eg. VAIOShellStarter.exe) under the list of Currently Installed Programs.
  5. Click on the VAIOShellStarter.exe-associated entry.
  6. Click the Remove button on the right side.
  7. Follow the on-screen directions to complete the uninstallation of your VAIOCare.exe-associated program.
Instructions for Windows 8:
  1. Hover the cursor in the bottom left of the screen to produce the Start Menu image.
  2. Right-Click to bring up the Start Context Menu.
  3. Click Programs and Features.
  4. Locate VAIOCare.exe-associated program (eg. VAIOShellStarter.exe) under the Name column.
  5. Click on the VAIOShellStarter.exe-associated entry.
  6. Click the Uninstall/Change on the top menu ribbon.
  7. Follow the on-screen directions to complete the uninstallation of your VAIOCare.exe-associated program.
After you have successfully uninstalled your VAIOCare.exe-associated program (eg. VAIOShellStarter.exe), reinstall the program according to the Sony Corporation instructions.

Tip: If you are positive that your EXE error is related to a specific Sony Corporation program, uninstalling and reinstalling your VAIOCare.exe-related program will likely be the solution to your problem.

Step 7: Run Windows System File Checker ("sfc /scannow")


System File Checker is a handy tool included with Windows that allows you scan for and restore corruptions in Windows system files (including those related to VAIOCare.exe). If System File Checker finds a problem with your EXE or other critical system file, it will attempt to replace the problematic files automatically.
To run System File Checker (Windows XP, Vista, 7, and 8):
  1. Click the Start button.
  2. Type "command" in the search box... DO NOT hit ENTER yet!
  3. While holding CTRL-Shift on your keyboard, hit ENTER.
  4. You will be prompted with a permission dialog box.
  5. Click Yes.
  6. A black box will open with a blinking cursor.
  7. Type "sfc /scannow" and hit ENTER.
  8. System File Checker will begin scanning for VAIOCare.exe and other system file problems (be patient - the system scan may take a while).
  9. Follow the on-screen commands.

Step 8: Install All Available Windows Updates


Microsoft is constantly updating and improving Windows system files that could be associated with VAIOCare.exe. Sometimes resolving your EXE problems may be as simple as updating Windows with the latest Service Pack or other patch that Microsoft releases on an ongoing basis.
To check for Windows Updates (Windows XP, Vista, 7, and 8):
  1. Click the Start button.
  2. Type "update" into the search box and hit ENTER.
  3. The Windows Update dialog box will appear.
  4. If updates are available, click the Install Updates button.

Step 9: Perform a Clean Installation of Windows


Caution: We must emphasize that reinstalling Windows will be a very time-consuming and advanced task to resolve VAIOCare.exe problems. To avoid data loss, you must be sure that you have backed-up all of your important documents, pictures, software installers, and other personal data before beginning the process. If you are not currently backing up your data, you need to do so immediately (download a highly-recommended backup solution) to protect yourself from permanent data loss.
This step is your final option in trying to resolve your VAIOCare.exe issue. Reinstalling Windows will erase everything from your hard drive, allowing you to start again with a fresh system. Furthermore, a clean install of Windows will also quickly clean out any and all "junk" that has accumulated over the normal usage of your computer.

Please Note: If VAIOCare.exe errors still persist after a clean install of Windows, your EXE problem MUST be hardware related. If that is the case, then it is likely you will need to replace the associated hardware causing the VAIOCare.exe error.
Filename: VAIOCare.exeLatest Known Version: 7.0.0.7070
Developer: Sony CorporationFile Size (Bytes): 867256
Software: VAIOShellStarter.exeOperating System: Windows
Description: Start VAIOShell
MD5: 3ac4605a0567454e11a680a531a3144f
SHA1: 1E9B55852B127A54D32DB1AF2D07831A8EC47632

Operating System Information

VAIOCare.exe error messages can occur in any of the following Microsoft Windows operating systems:
  • Windows 8
  • Windows 7
  • Windows Vista
  • Windows XP
  • Windows ME
  • Windows 2000
 
Read More