Advertise with me..................................

Your Ads Here..................................

Just for my note..................................

You can read but don't do negative..................................

You get +, then don't do - ..................................

Showing posts with label iPad. Show all posts

How to Reset iPhone Without Apple ID

2:21:00 AM | , , , ,

How to Reset iPhone without Apple ID when Find My iPhone is OFF

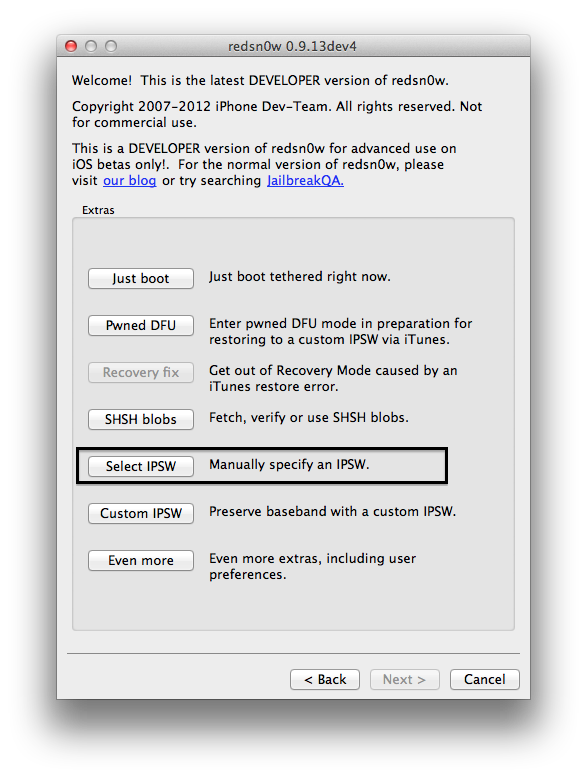
You can update your phone or make a hard reset by entering into DFU mode. This mode allows you to update firmware and iOS without entering your Apple ID. Follow the below instructions steps by steps to enter into DFU mode and reset your iPhone to Factory defaults without Apple ID.
  • Step 1: Start iTunes on your computer and plug your iPhone into the computer with a USB cable.
  • Step 2: Then turn off the iPhone.
  • Step 3: Now you will need to press and hold the Home button for 3 seconds.
  • Step 4: Then you need to press the Power button and Home button and hold them for 10 seconds.
  • Step 5: You can now release the Power button when Apple logo disappears.
  • Step 6: Release the Home button when iTunes detects the iPhone in Recovery mode.
  • Step 7: Follow the steps on iTunes. Keep your backup before these actions. You can now update your phone or make a simple reset from the following interface.
Now you will be notified after the reset and your iPhone will take a restart. You can start to follow the guide to reset your iPhone without Apple ID.
Read More

How to Reset the iPhone passcode?

9:29:00 PM | , ,

If you forgot your iPhone passcode you can bypass the lock screen completely and reset the passcode by using iPhone recovery mode. This will get around a locked down iOS device that is stuck on the password screen, but there are some important considerations to take before proceeding.
Warning: This will require you to restore your iPhone, iPad, or iPod touch. That means you will lose all data on the device and be back to factory settings as if the device was brand new. This should be considered a last resort.
Requirements:
  • iPhone, iPad, or iPod touch that is stuck on the passcode screen
  • USB cable to connect the device to a computer
  • Mac or Windows PC
  • iTunes
Those are the core requirements, if you have those you can proceed to reset the missing passcode.

Bypass & Reset the iPhone Passcode

As mentioned above, this also will work on other iOS devices.
  1. Disconnect the USB cable from the iPhone, leave the other end connected to your Mac/PC
  2. Launch iTunes
  3. Press and hold the Home and Power button on the top of the iPhone to turn off the device
  4. Press and continue to hold the Home button while you reconnect the USB cable to your iPhone, this will cause the iPhone to turn on
  5. Continue to hold the Home button until an alert message in iTunes appears that an iPhone in recovery mode has been detected
This is the general message you will see:
iphone recover mode detected
Now that the iPhone is in recovery mode and has been detected by iTunes, you must restore the device:
  • From iTunes, look under the “Summary” tab
  • Click on the “Restore” button within iTunes
This will wipe all files, settings, and apps from the iPhone, including the passcode. When the restore is finished, the iPhone will be at the factory settings. At this point you can choose to start from scratch or to restore the iPhone from a backup that is either stored on the computer with iTunes, or by using an Apple ID and restoring from an iCloud backup. Both of those are very simple processes and you will have the option to do so once the device has been rebooted and is back at factory settings, where the initial setup screens will greet you.
This tip came from an iPhone repair shop, where it’s common for people to bring in a phone for fixing and then forget to provide the passcode.

Having Trouble? Alternate Instructions for Resetting the iOS Passcode

This is another reader provided alternate approach to initiate the recovery process, it’s similar but requires the device to be turned off first. If for some reason you are having problems with the repair shop method above you can try this instead:
  • Turn the iPhone OFF by pressing and holding the Power button until the device powers off
  • Attach the USB cable to the computer and launch iTunes – do not connect the iPhone yet
  • Hold down the Home button, and while continuing to hold it connect the iPhone to the computer via USB
  • While continuing to hold the Home button, the iPhone screen will turn on and show an iTunes logo and a USB cable
  • When an alert box opens in iTunes indicating that a device has been detected in Restore mode, now let go of the Home button
  • Click the “Restore” button in iTunes – if a local firmware file is found it will restore immediately, otherwise it will download the appropriate firmware from Apple’s servers
  • Now just wait until Restore is completed, the device will boot as if it was brand new
Once the phone has booted, you can either use it as brand new or initiate a recovery from a backup. A backup is necessary if you wish to restore personalization data like Contacts, apps, SMS, photos, and phone numbers. iCloud will do that for you so long as the device was routinely backed up to iCloud and that the same Apple ID is used during the setup, but a backup stored in iTunes will also work. If you are only looking to restore apps and not personal data, simply use the same Apple ID and then launch the App Store to download the apps again to that device.
Read More

How to Jailbreak iOS 6 and Install Cydia

12:57:00 AM | , , ,

The Jailbreak Process
The jailbreak process shouldn’t be considered difficult but it is definitely more complicated then the processes previously seen in Absinthe and JailbreakMe. This is a traditional DFU mode process which requires you to enter DFU mode for anything to take place.
  1. Download the iOS 6 IPSW and the correct version of Redsn0w.
  1. Open Redsn0w and click on “Extras”
  2. Choose “Select IPSW”
  1. Browse for your downloaded IPSW.
    • Or select the file iTunes downloaded in the following locations:
      • OS X: “~/Library/iTunes/iPod Software Updates” or “~/Library/iTunes/iPhone Software Updates”
      • Windows: “%appdata%/Apple ComputeriTunesiPod Software Updates” or “%appdata%/Apple ComputeriTunesiPhone Software Updates”
  1. Once the IPSW has been loaded, click back to the main menu.  Then select “Jailbreak”.
  2. In the options, make sure “Install SSH” is checked.  Other then that, leave the rest alone.  Click Next.
  1. This is the part where you enter DFU mode to actually perform the Jailbreak.  How to enter DFU mode is described in detail below.
    • Hold the lock button and slide to power off.  Wait for the device to be fully powered off before continuing.
    • Press the lock button for 2 seconds then, without letting go of the lock button, press the home button simultaneously.
    • Keep the lock and home button pressed at the same time until the screen goes black.  (around 20 seconds)
    • Once the screen goes black, without letting go of the home button, release the lock button.
    • Keep holding the lock button until Redsn0w detects it.
    • If an Apple logo appears, you are not in DFU mode.  The screen should remain off.
  2. Let the Jailbreak run.  This could take a few minutes.  Be patient and let it complete on it’s own. When it is done, click back.  Do not exit Redsn0w.

Tethered Boot

As we previously stated, this is a tethered jailbreak which means it is tethered to your computer for any boot sequence.  In other words, your device will not boot into a jailbroken state without booting with Redsn0w.  Although it is possible to boot without Redsn0w at first, once MobileSubstrate, or any other system level add-on is installed, you will no longer be able to boot without completing a tethered boot process.
  1. Click on the “Extras” button on the Redsn0w main screen.
  2. The first item on the list is “Just Boot”. Select that and we will be on our way.
  1. At the next screen, it will inform is that we need to enter DFU mode once again.  Enter DFU Mode and the process will begin automatically.
  2. Let the sequence complete and if all goes well, you will be greeted at the lock screen.  There will be no directly noticeable changes made to the device.

Installing Cydia
Since the Jailbreak does not install Cydia, we will have to do that manually.  We will be logging in via SSH and using a couple commands to download and install the necessary Cydia files.
OS X
  1. Open Terminal.  (Located in /Applications/Utilities/Terminal.app)
  2. Find the IP Address of your iOS device by tapping on the blue circle next to your network name.
  3. Type in “ssh root@<IP Address>”.  Replace <IP Address> with your IP Address.
  4. When it asks if your sure you want to continue connecting, type “yes”.
  5. When it asks you for a password, type “alpine” (Characters won’t show up, this is normal).
  6. If all goes well, you now have full control of the iOS Device via command line.  Paste in the following command:
“wget -q -O /tmp/cyinstall.sh http://downloads.kr1sis.net/cyinstall.sh && chmod 755 /tmp/cyinstall.sh && /tmp/cyinstall.sh”
  1. Let the process run and when it completes, SpringBoard will restart.  Cydia will now be on your home screen.  You can launch the app and it will prepare the filesystem as usual.  Just let it complete and respring.  Once that is done, Cydia will be fully operational.

Windows
  1. Download and install PuTTY.
  2. Find the IP Address of your iOS device by tapping on the blue circle next to your network name.
  3. On the main screen of PuTTY, there is a box to enter an IP Address.  Enter the IP Address of your device.
  4. When it asks if your sure you want to continue connecting, click “Yes”.
  5. When it prompts you with “login as:”  type in “root”.
  6. When it asks you for a password, type “alpine” (Characters won’t show, this is normal).
  7. If all goes well, you now have full control of the iOS Device via command line.  Paste in the following command:
“wget -q -O /tmp/cyinstall.sh http://downloads.kr1sis.net/cyinstall.sh && chmod 755 /tmp/cyinstall.sh && /tmp/cyinstall.sh”
  1. Let the process run and when it completes, SpringBoard will restart.
  2. Cydia will now be on your home screen.  You can launch the app and it will prepare the filesystem as usual.  Just let it complete and respring.  Once that is done, Cydia will be fully operational.

Rebooting

Since this is a tethered jailbreak, you will need to use Redsn0w to boot.  It is recommended to leave your device on in this state.  If you do ever need to reboot you will have to refer to the tethered boot directions above.


Video
Read More

IOS 6 Untethered Jailbreak

12:27:00 AM | , , , ,

Tired of wasting your time on non working software and want to know that which software can help you and for free of cost. This is the right place for you and now you have the option to jailbreak your idevice for free. All you would have to jailbreak the software. The software has been released by the iPhone dev team with the cooperation of Chronic dev team. If you are new user to the iDevice then you would have to follow the steps and instuctions and it has been mentioned below.

Steps and Instructions
First of all download the iOS 6 Untethered Jailbreak tool and you can download it by clicking the button below. You would have to choose your operating system wether you are on MAC or on PC. Click the button below.


Once you are finished with download the iOS 6 Jailbreawik tool then you would have to perform further more steps and instructions and they have been mentioned below.

1. Open the application, if you are on Windows Run as Administrator.
2. Select your device and its firmware from the list.
3. After that select the version to which you want to upgrade your device.
4. Now press the make it ra1n button. It will take sometime to perform the job.
5. Once it finish, reboot your device. You are done!
Read More

Preparing your iPhone, iPad, or iPod touch for repair

5:23:00 PM | , , ,

Products Affected

iPhone, iPod touch, iPad
If possible, please perform these steps in the following order before sending your iPhone, iPad, or iPod touch in for service:
  1. Sync your device with iTunes
  2. Back up your device
  3. Erase all data from your device by tapping Settings > General > Reset > Erase All Content and Settings
  4. Remove the SIM card for GSM devices or suspend service on CDMA devices (see below)

Additional Information

If your iPhone or iPad has cellular service, it is important to perform this additional step, which will deactivate or suspend service prior to sending in your device. Failure to do so could lengthen the turnaround time of the service.
  • CDMA model: Contact your wireless carrier to suspend service for your device.
  • GSM model: Remove the SIM card as shown below with the SIM eject tool or a small paperclip.
iPhone 4 (GSM model)
iPhone 4S
iPhone 3G
iPhone 3GS
Original iPhone
iPad 2 Wi-Fi + 3G 
(GSM model)
iPad Wi-Fi + 3G
Note: After removing the SIM card, push the SIM tray back into your device before sending it in for service. Insert the tray in the same orientation that you removed it; it will only fit one way.


Important: Information about products not manufactured by Apple is provided for information purposes only and does not constitute Apple’s recommendation or endorsement.
Read More

Do-It-Yourself iPad Repairs

5:20:00 PM |

iPad Generation 1 Digitizer and Front Glass


iPad Digitizer and Front Glass
Price: $109.00 

OEM Replacement Digitizer and Front Glass for iPad - WIFI & 3G
iPad 2 Digitizer and Front Glass - Black

iPad 2 Digitizer and Front Glass - Black
Price: $139.00 

OEM Replacement Digitizer and Front Glass for iPad 2 - WIFI & 3G - Black
iPad 2 Digitizer and Front Glass - White

iPad 2 Digitizer and Front Glass - White
Price: $129.00 

OEM Replacement Digitizer and Front Glass for iPad 2 - WIFI & 3G - White
iPad 2 Bezel - Black


iPad 2 Bezel - Black
Price: $19.00 

OEM Replacement Black Bezel for iPad 2 - WIFI & 3G - BLACK
iPad 2 Bezel - White


iPad 2 Bezel - White
Price: $19.00 

OEM Replacement White Bezel for iPad 2 - WIFI & 3G - WHITE
iPad LCD Screen and Digitizer Frame Clips - 1pc
iPad LCD Screen and Digitizer Frame Clip - 1pc
Price: $1.39 

iPad LCD Screen and Digitizer Frame Clips - 1pc -
iPad LCD Screen and Digitizer Frame Clips - 14pc

iPad LCD Screen and Digitizer Frame Clips - 14pc
Price: $17.99 

iPad LCD Screen and Digitizer Frame Clips - 14pc
iPad LCD Connector Flex Cable


iPad LCD Connector Flex Cable
Price: $29.00 

iPad LCD Connector Flex Cable

iPad Frame Assembly
Price: $99.00 

iPad Frame Assembly
iPad 3G Frame Assembly
Price: $129.00 

iPad 3G Frame Assembly
iPad WIFI Frame Assembly
Price: $129.00 

iPad WIFI Frame Assembly
iPad Home Button - Button ONLY


iPad Home Button - Button ONLY
Price: $89.00 

iPad Home Button - Button ONLY
iPad Headphone Jack Flex Cable & Mic
Price: $129.00 

iPad Headphone Jack Flex Cable & Mic
iPad Volume Button/Power Button/Orientation Switch Flex Cable
Price: $129.00 

iPad Volume Button/Power Button/Orientation Switch Flex Cable
iPad Power Button, Volume Button and Silent Switch Assembly
Price: $129.00 

iPad Power Button, Volume Button and Silent Switch Assembly
iPad Volume Button - Button Only

iPad Volume Button - Button Only
Price: $89.00 

iPad Volume Button - Button Only
iPad Orientation Lock Button - Button Only

iPad Orientation Lock Button - Button Only
Price: $129.00 

iPad Orientation Lock Button - Button Only
iPad Power Button - Button Only
Price: $89.00 

iPad Power Button - Button Only
iPad Home Button Assembly
Price: $19.00 

iPad Home Button Assembly
iPad Power Button, Volume Switch and Accelerometer Switch Assembly
Price: $99.00 

iPad Power Button, Volume Switch and Accelerometer Switch Assembly
iPad Bottom Loud Speaker
Price: $59.00 

iPad Bottom Loud Speaker
iPad Ambient Light Sensor Cable
Price: $109.00 

iPad Ambient Light Sensor Cable
iPad 3G antenna flex (in the screen)
Price: $129.00 

iPad 3G antenna flex (in the screen)
iPad Dock Connector Board
Price: $139.00 

iPad Dock Connector Board
Read More